How to Clean a K-Cup Coffee Machine: Maintenance Instructions
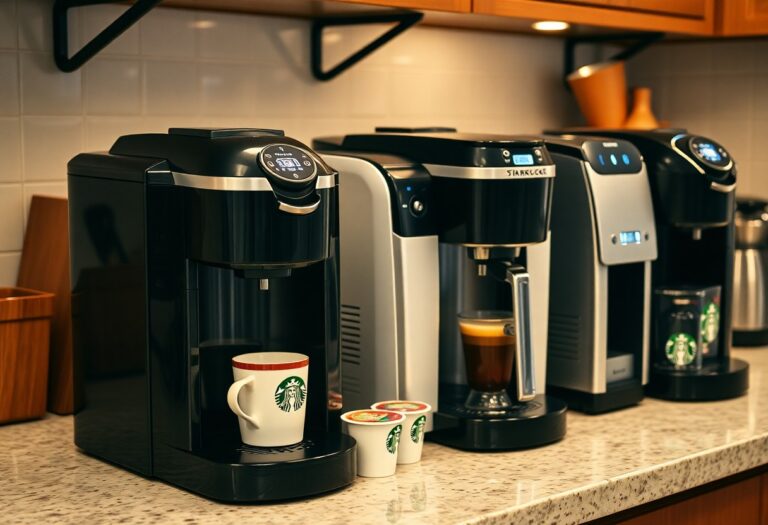
A K-Cup coffee machine has become a must-have for many coffee lovers who value convenience and speed. These machines use pre-packaged pods to brew single servings of coffee, eliminating the need for measuring grounds or dealing with filters. Their popularity comes from the ability to quickly enjoy a fresh cup with minimal cleanup.
However, keeping your K-Cup machine clean is essential for optimal performance and longevity. Neglecting regular maintenance can lead to clogged parts, off-tasting coffee, and even shortened machine lifespan. Residue buildup not only affects flavor but also impacts the machine’s ability to function properly.
This article provides detailed maintenance instructions on how to clean a K-Cup coffee machine. You’ll find step-by-step guidance on routine cleaning, descaling, needle care, water filter replacement, and additional tips. Following these practices ensures your coffee maker stays in top shape, delivering consistently great brews every time.
1. Routine Cleaning
Routine cleaning is crucial for keeping your K-Cup coffee machine working well. Regularly wiping down and cleaning the machine stops coffee oils, dust, and mineral buildup that can harm the taste of your brew and shorten the lifespan of the machine. When residue builds up, it blocks the system and makes each cup taste flat.
Follow this step-by-step guide to clean essential components:
- Exterior: Use a damp cloth to wipe down the machine’s outer surface. Avoid abrasive cleaners or soaking any part of the machine to protect its finish.
- Water Reservoir: Remove the water reservoir and wash it with warm, soapy water. Rinse thoroughly to avoid soap residue. This part often harbors bacteria if left uncleaned.
- Removable Parts: Take out the drip tray and pod holder for separate cleaning. Wash these with mild detergent and warm water. The drip tray collects spills and coffee drips, making it prone to sticky buildup.
- Interior Surfaces: Wipe accessible interior areas carefully with a damp cloth if visible residue exists.
After washing, dry all parts completely before putting the machine back together. Leaving moisture inside can lead to mold growth or corrosion over time, which affects both cleanliness and function.
Keeping up with routine cleaning ensures every cup tastes fresh and maintains consistent brewing pressure and flow rate. It also reduces the need for more extensive maintenance later on by stopping stubborn buildups. You’ll find that a few minutes spent cleaning regularly saves frustration and repair costs in the long run.
2. Descaling
Descaling is a vital maintenance step for your K-Cup coffee machine. Over time, minerals like calcium and magnesium present in water accumulate inside the machine, forming deposits known as limescale. These mineral deposits can clog internal components, reduce water flow, and alter the taste of your coffee, resulting in weaker or bitter brews. Regular descaling restores optimal function and preserves the flavor integrity of each cup.
How Often to Descale
Frequency depends largely on your local water hardness and how often you use the machine:
- Soft water areas: Every 3 to 6 months
- Moderate to hard water areas: Every 1 to 3 months
- Heavy daily use: More frequent descaling might be necessary
If you notice slower brewing times or unusual tastes, it’s likely time for descaling regardless of schedule.
Descaling Instructions
You can descale using either distilled white vinegar or a commercial solution like Keurig’s descaling product. Both effectively dissolve mineral buildup.
Using Distilled White Vinegar:
- Empty the water reservoir completely.
- Fill the reservoir with a mixture of half distilled white vinegar and half water.
- Place a large mug on the drip tray to catch liquid.
- Run multiple brew cycles without inserting a K-Cup pod until the reservoir is empty—this allows vinegar solution to pass through internal parts.
- Let the machine sit for 30 minutes to an hour for deep cleaning effects.
Using Commercial Descaling Solution:
- Follow package instructions to mix solution with water in the reservoir.
- Run brew cycles similar to the vinegar method until empty.
- Allow recommended soak time per product guidelines.
Post-Descaling Rinse Cycles
After descaling, run at least three full rinse cycles with fresh, clean water only (no pods or vinegar). This flushes out any residual cleaning agent or vinegar taste that could compromise your next brew.
Avoid skipping this step—it ensures no lingering flavors or chemicals remain trapped inside your machine’s system.
Maintaining a regular descaling routine based on these guidelines will keep your K-Cup coffee maker performing smoothly and delivering rich, flavorful coffee every time you brew.
3. Cleaning Needles
Clogged needles in your K-Cup coffee machine can lead to weak or inconsistent brews, affecting the quality of your coffee. To maintain optimal performance, it’s essential to clean the needles regularly. Here’s how you can safely clean the needles:
1. Prepare Your Tools:**
Gather a straightened paper clip or a specialized needle cleaning tool if you have one available.
2. Unplug the Machine:**
Before starting any cleaning process, unplug your K-Cup coffee machine to ensure safety.
3. Access the Needles:**
Locate the entrance and exit needles on your machine. These are responsible for puncturing the K-Cup during brewing.
4. Cleaning Process:**
- Take the paper clip or needle cleaning tool and gently insert it into each needle to dislodge any coffee grounds or debris that may be clogging them.
- Move the tool in and out a few times to ensure thorough cleaning.
5. Visual Inspection:**
After cleaning, visually inspect the needles to ensure they are free from any residue or blockages.
6. Test Run:**
Plug in your machine and run a cleansing brew cycle with just water to clear out any remaining particles.
For more detailed instructions on maintaining your K-Cup coffee maker, including cleaning tips, refer to this instruction booklet. Regularly cleaning your machine’s needles will help maintain consistent brew quality and prevent any issues with your K-Cup coffee maker. Incorporate this simple maintenance task into your routine for delicious cups of coffee every time.
4. Replacing Water Filter
Many K-Cup coffee machines have a built-in water filter system designed to improve the taste of your coffee by reducing impurities such as chlorine and other contaminants. This filtration process is important for delivering a cleaner, smoother cup of coffee, especially if you use tap water that may contain minerals or chemicals affecting flavor.
Water filter replacement is essential to maintain this benefit. Over time, filters become saturated with trapped particles and lose effectiveness. Neglecting to replace the filter can result in:
- Diminished taste quality due to residual chlorine or mineral buildup
- Potential clogging inside the machine from trapped debris
- Reduced lifespan of internal components sensitive to water quality
The recommended replacement frequency varies depending on factors like:
- Water hardness: Hard water requires more frequent filter changes.
- Usage level: Machines used multiple times daily need quicker replacement intervals.
- Manufacturer guidelines: Brands like Keurig often suggest changing filters every 2 months or after about 60 tank refills.
To replace the water filter:
- Remove the water reservoir from the machine.
- Locate the water filter holder and remove the old filter.
- Soak a new charcoal-based filter in cold water for 5 minutes before inserting.
- Place the new filter securely back in the holder and reattach it to the reservoir.
Regularly replacing your K-Cup machine’s water filter ensures taste improvement by consistently removing chlorine and other impurities, keeping each brew fresh and flavorful.
5. Additional Tips for Maintaining Your K-Cup Coffee Machine
Maintaining your K-Cup coffee machine goes beyond routine cleaning and descaling to ensure proper functioning, great tasting coffee, and longevity. Consider these essential practices:
- Use Filtered Water: Filtered water reduces mineral buildup inside the machine, leading to fewer clogs and less frequent descaling. This simple habit protects internal components and preserves the flavor quality of each cup.
- Avoid Direct Sunlight and Extreme Temperatures: Placing your machine in a shaded, temperature-controlled environment prevents plastic parts from warping or cracking. Excessive heat or cold can damage electronics and seals, compromising performance.
- Store Unused Pods Properly: Keep K-Cup pods in a cool, dry place away from moisture and heat. Proper storage maintains pod freshness, ensuring every brew delivers rich aroma and flavor.
Following these tips supports the ongoing health of your machine, helping you enjoy consistent brews while extending its service life.
Conclusion
Taking care of your K-Cup coffee machine is more than just making a quick cup. Regular maintenance tasks make sure every brew tastes fresh and your machine works well for years. Following the How to Clean a K-Cup Coffee Machine: Maintenance Instructions shared here helps you:
- Prevent buildup and clogs
- Preserve water quality and flavor
- Extend the machine’s lifespan
Add these cleaning, descaling, needle care, and filter replacement routines to your schedule. Your daily coffee ritual will reward you with consistent quality — a small effort for a big payoff in taste and durability.
FAQs (Frequently Asked Questions)
What is a K-Cup coffee machine and why is it popular among coffee lovers?
A K-Cup coffee machine is a single-serve brewing system that uses pre-packaged coffee pods called K-Cups. It is popular among coffee lovers for its convenience, quick brewing time, and consistent quality, allowing users to enjoy a fresh cup of coffee with minimal effort.
How often should I clean my K-Cup coffee machine to maintain optimal performance?
Routine cleaning should be performed regularly, ideally after every few uses. This includes wiping down the exterior, cleaning the water reservoir, and washing removable parts like the drip tray and pod holder. Thorough drying after cleaning is important to prevent moisture-related issues and ensure consistent brew quality.
Why is descaling necessary for my K-Cup coffee machine and how do I do it?
Descaling removes mineral deposits caused by hard water that can affect the taste of your coffee and impair machine functionality. Depending on your water hardness and usage, descaling should be done every 3-6 months. You can descale using distilled white vinegar or a commercial descaling solution like Keurig’s product. After descaling, run multiple rinse cycles to eliminate any residue.
How do I clean the needles in my K-Cup coffee machine to prevent clogs?
Clogged needles can lead to weak or inconsistent brews. To clean them safely, use a straightened paper clip or a specialized needle cleaning tool to gently remove any residue blocking the needles. This maintenance task ensures proper water flow and better tasting coffee.
When should I replace the water filter in my K-Cup coffee machine?
If your K-Cup machine has a built-in water filter system designed to reduce impurities like chlorine and improve taste, it’s recommended to replace the filter every 2 months or based on your local water quality and usage frequency to maintain optimal flavor and machine performance.
What additional tips can help me maintain my K-Cup coffee machine for longevity and great tasting coffee?
To keep your K-Cup machine functioning properly: use filtered water to minimize mineral buildup; avoid placing the machine in direct sunlight or extreme temperatures; store unused pods in a cool, dry place to preserve freshness; and incorporate regular cleaning and descaling into your routine for consistently delicious coffee and prolonged machine lifespan.