How to Repair a Coffee Machine – Troubleshooting Guide
Troubleshooting the Basics: Common Coffee Machine Issues
Even the most reliable coffee machines encounter issues from time to time. Recognizing these common problems allows you to act quickly and restore your beloved brew. From machines that won’t turn on to unexpected leaks, understanding what to look for can help you determine whether it’s a simple fix or requires more in-depth repairs.
Identifying the Symptoms
Pay attention to the symptoms your coffee machine exhibits. For instance, if the brew cycle doesn’t start, you may notice your machine displays no lights. Alternatively, if it’s brewing but the taste is off, you might have issues with the water or coffee grounds. Identifying the specific symptoms assists in guiding your troubleshooting process effectively.
Quick Fixes and Immediate Solutions
Before diving deep into repairs, consider basic quick fixes. Often, a simple reset by unplugging your machine for a few minutes can resolve electronic glitches. If your machine is leaking, check for loose connections or ensure the carafe is properly seated. Moreover, cleaning the water tank and brew basket frequently can prevent clogs that disrupt functionality.
Assessing quick fixes helps you tackle most minor issues confidently. For example, if the coffee doesn’t heat up, removing and reseating the water reservoir might restore function. If your machine is producing weak coffee, trying a different coffee grind size or increasing the coffee-to-water ratio can significantly enhance your brew. Regular maintenance, including descaling your coffee maker at least every 1-3 months depending on usage, is necessary for preventing buildup and ensuring optimal performance. By adopting these methods, you can often resolve issues swiftly without the need for professional assistance.
Key Takeaways:
- Identify common issues such as water flow problems or unusual noises to narrow down the cause of the malfunction.
- Regularly clean and descale the machine to prevent buildup that can lead to performance issues.
- Check the power source and connections, ensuring that the machine is properly plugged in and operational.
- Refer to the manufacturer’s manual for specific troubleshooting steps and maintenance recommendations tailored to your model.
- Seek professional help when complex repairs are needed, especially for electrical or internal component issues.
Dissecting Mechanical Malfunctions
Understanding the intricacies of your coffee machine’s mechanics can shed light on persistent issues. By dissecting the various components, you can pinpoint mechanical malfunctions that hinder performance. Look for common pitfalls such as clogs, wear and tear on parts, or even electrical failures that can throw your machine off balance. This approach not only simplifies the diagnosis but also helps in formulating a precise repair plan tailored to the specific malfunction.
Understanding Component Functionality
Each component of your coffee machine plays a vital role in the brewing process. The water reservoir, pump, heating element, and group head all have distinct functions that work together for a perfect cup of coffee. A clogged or defective part can disrupt this harmony, leading to various issues like inadequate water flow or improper brewing temperatures. Familiarizing yourself with these functionalities equips you with the knowledge needed to troubleshoot effectively.
Diagnosing Pump and Heating Element Problems
Issues with the pump or heating element can significantly affect your machine’s ability to brew coffee. If your coffee isn’t brewing at all, begin by checking the pump for blockages or electrical failure. Signs such as unusual noises during operation might indicate pump malfunctions or air leaks. The heating element, responsible for reaching the optimal temperature, can also fail, resulting in lukewarm or cold coffee. Evaluating both components is important for restoring proper functionality.
To diagnose these problems accurately, start by inspecting the pump for obstructions that could hinder water flow. Utilize a multimeter to check for electrical faults in the pump’s wiring. If the pump is functional, test the heating element by measuring its resistance; a reading outside the manufacturer’s specifications may indicate failure. Furthermore, if you notice your coffee machine taking too long to heat or producing inconsistent brew temperatures, this often points directly to heater issues. Addressing these components can often lead to quick and effective repairs.

Cleaning and Maintenance: The Forgotten Heroes
A coffee machine runs the risk of becoming a neglected appliance, yet regular cleaning and maintenance can extend its lifespan and guarantee optimal brewing results. Failing to keep your machine clean allows residue and mineral buildup to compromise the quality of your coffee and the functionality of the machine itself. Implementing a consistent cleaning routine not only enhances flavor but also prevents costly repairs down the line.
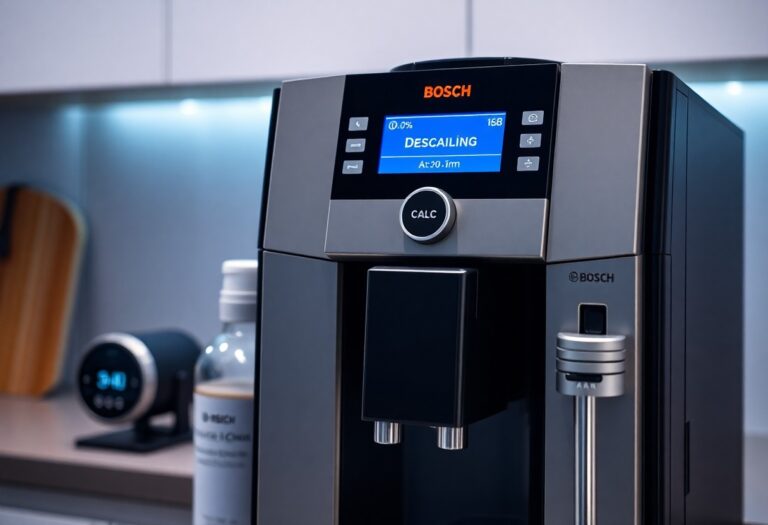
Descaling Your Machine for Optimal Performance
Descaling is vital for maintaining your coffee machine’s efficiency, particularly in regions with hard water. Over time, minerals accumulate, leading to blockages that impact water flow and brewing temperature. Utilizing a descaling solution made from citric acid or commercial descalers every three to six months helps dissolve these deposits, keeping your machine running smoothly and your coffee tasting fresh.
Importance of Regular Cleaning: Preventive Measures
Regular cleaning acts as a safeguard against malfunction. Not only does it ensure that the internal components are free from coffee oils and miner buildup, but it also protects the machine from more severe issues such as pump failure or heating element corrosion. By devoting just a few minutes every week for routine maintenance, you can preserve the integrity and performance of your machine, all while enjoying consistently great coffee.
Maintenance reduces the chance of needing unexpected repairs, which can be both inconvenient and costly. A simple weekly wipe-down of the exterior, along with monthly cleaning of removable parts, can prevent dirt and grime from accumulating. As scale buildup can significantly impact the brewing process, you’re likely to see a noticeable difference in flavor and time taken to brew as well. Overall, adopting these habits fosters a better coffee experience and minimizes the need for potential future repairs.

Power Problems: When Nothing Turns On
Experiencing a dead coffee machine can be frustrating, especially when you rely on that morning brew to kickstart your day. Power problems often manifest as the machine not turning on at all. This issue might stem from faulty connections, blown fuses, or even deeper electrical malfunctions. Dive into the troubleshooting process to identify the exact cause and get your coffee maker back in action.
Checking Power Sources and Connections
Start by examining the power sources and connections. Ensure the coffee machine is plugged in securely and that the outlet has power—try plugging in a different appliance to test the outlet. Additionally, inspect the power cord for any visible signs of damage, which could indicate a need for replacement or repair.
Resetting and Troubleshooting Circuit Breakers
Sometimes, circuit breakers trip, cutting off power to your coffee machine. Locate your home’s circuit breaker panel and look for any tripped breakers, which usually appear in the “off” position or may be slightly off-center. By switching the breaker back to the “on” position, you can often restore power to your coffee machine quickly.
To effectively reset circuit breakers, first, switch them to the “off” position before flipping them back to “on.” If they continue to trip, this may indicate a more significant issue such as overloading or a short circuit. Consider which appliances are plugged in before the breaker tripped. If needed, unplug non-crucial devices or consult a qualified electrician to resolve any underlying electrical issues, ensuring your coffee machine can brew without interruptions.
The Spills and Leaks Dilemma
Finding coffee puddles or water drips around your machine can be disheartening. Spills and leaks not only lead to a mess but also indicate underlying issues that need addressing. Before you pour your next cup, it’s necessary to understand where these leaks might be originating and how to stop them from affecting your daily routine.
Pinpointing the Source of Leaks
Begin by inspecting your coffee machine for obvious signs of leakage. Common areas to check include the water reservoir, hoses, and the brew basket. If any water collects on the counter or beneath the machine, closely examine these parts for cracks or faulty seals. If you’re unable to find the source visually, try running the machine empty to observe where water escapes, enabling you to target your repair efforts effectively.
Sealing and Repairing Common Leak Points
To address leaks effectively, you’ll often need to replace worn gaskets, seals, and hoses or apply food-safe silicone sealant to cracked areas. Ensure all parts are firmly attached after replacing or resealing them, as loose connections can lead to repeated leaks. Refilling the reservoir slowly and monitoring for additional leaks can help validate that the problem is resolved.
For example, if you discover a crack in the water reservoir, you can either replace it or use a durable epoxy designed for plastics as a quick fix. Common gaskets, like those found around the brew head, can be replaced in minutes and typically cost less than $10. Additionally, pay attention to the area where the water flow enters the brew basket; tightening screws or replacing worn parts here can prevent leaks from reoccurring. Your machine’s longevity rests on these small yet significant repairs, ensuring you can enjoy that delicious cup of coffee worry-free.
Advanced Repairs: When to Call in the Pros
Sometimes, your coffee machine presents issues that are beyond DIY fixes. If you’ve tried the basic troubleshooting steps and nothing has resolved the problem, you may need to enlist the help of a professional. Worn components, complex electrical issues, or internal mechanical failures often require specialized knowledge and tools. Taking this route not only ensures a proper fix but can also save you from damaging your machine further.
- Persistent leaks that you can’t locate.
- Unusual noises that signify internal damage.
- Electrical issues such as power failure or short circuits.
- Faulty heating elements or thermostats.
- Complex calibration needed for espresso machines.
| Signs You Need Professional Help | Possible Issues |
|---|---|
| Persistent leaks | Damaged seals or pumps |
| Unusual sounds | Internal wear or misalignment |
| Failure to heat | Faulty heating element |
| Electrical problems | Wiring or circuit board issues |
Recognizing the Limits of DIY Repairs
Attempting to fix your coffee machine can be a rewarding experience but knowing when to stop is vital. If you find yourself facing complex issues, such as electrical or mechanical failures that are beyond a simple cleaning, it’s best to back away. Straying into these territories without adequate expertise can lead to permanent damage, potentially costing more than hiring a professional in the first place.
Selecting the Right Technician for Complex Issues
Choosing a technician should involve verifying their credentials and experience with your specific machine model. Look for professionals who are certified and come with glowing reviews from previous clients. Specialized knowledge can make a significant difference in effectively diagnosing and fixing problems without causing further damage to delicate components.
Utilize online platforms to find certified technicians with proven track records. Consider checking out local repair shops or reaching out to the manufacturer for recommendations. Ensure they possess the necessary certifications and have experience with your specific type of coffee machine. Asking for references or reading reviews can also help you make an informed decision, ensuring that your beloved coffee maker gets the expert attention it needs to return to its best brewing form.
To wrap up
Following this troubleshooting guide will empower you to effectively diagnose and repair your coffee machine issues. By systematically addressing common problems, you can enhance your coffee experience and extend the life of your appliance. If you encounter persistent issues, consider exploring more solutions, such as the 40 Common Coffee Machine Problems & How to Fix Them. Your daily brews depend on it, so take the time to ensure your coffee machine is in peak condition.
FAQ
Q: What are the common signs that my coffee machine needs repair?
A: There are several signs that may indicate your coffee machine requires repair. These include leaks, unusual noises, slow brewing times, coffee that tastes different than usual, or if the machine doesn’t turn on at all. If you notice any of these issues, it’s advisable to troubleshoot the machine before concluding that it needs professional repair.
Q: How do I troubleshoot a coffee machine that won’t turn on?
A: If your coffee machine isn’t turning on, first check if it is properly plugged into a working outlet. Test the outlet with another appliance to ensure it’s functional. Check for any visible damage to the power cord. If the machine has a reset button, try pressing that. Consult the user manual for any specific troubleshooting steps related to your model. If all else fails, it may need to be serviced by a professional.
Q: What can I do if my coffee machine is leaking water?
A: If your coffee machine is leaking water, start by checking the water reservoir for cracks or misalignment. Ensure that all components are properly secured, as loose parts can cause leaks. Inspect the water lines for blockages or damages. Clean any mineral buildup that may be obstructing water flow. If the issue persists after checking these areas, there may be internal damage that necessitates professional repair.
Q: How can I resolve an issue where the coffee isn’t brewing correctly?
A: If your coffee is brewing weak or unevenly, it may be due to clogged filters or coffee grounds that are too coarse. Start by ensuring your equipment is clean, especially the filter basket and water lines. Also, check if you are using the correct grind size, as a finer grind typically results in stronger coffee. Additionally, verify that you are using the correct ratio of coffee to water. If adjustments don’t help, there might be a malfunction within the machine itself.
Q: Why is my coffee brewing too slowly, and how can I fix it?
A: Slow brewing can result from mineral buildup inside the coffee machine, which can impede water flow. To remedy this, try descaling the machine with a vinegar solution or a descaling product recommended by the manufacturer. Other potential causes include clogged filters or using too fine a coffee grind. Regular maintenance and cleaning can help prevent this issue from occurring in the future.