How to Work a Keurig Coffee Machine – Operating Guide
Keurig coffee machines offer a convenient way to brew your favorite coffee at home or in the office. In this comprehensive guide, you will learn how to use your Keurig safely and effectively, ensuring every cup is brewed to perfection. From filling the water reservoir to selecting your desired brew strength, we will cover each step in detail. Always handle hot water with care, as it can cause burns. With the right knowledge, you can enjoy a delightful cup of coffee in just minutes, enhancing your daily routine.
Key Takeaways:
- Ensure the water reservoir is filled with fresh water before brewing.
- Select your desired K-Cup flavor and place it into the machine’s holder securely.
- Choose your cup size based on how much coffee you want to brew using the compatible buttons.
- Press the brew button and wait for the coffee to brew until completion; avoid opening the machine during this process.
- Once brewed, enjoy your coffee and regularly clean the machine for optimal performance.

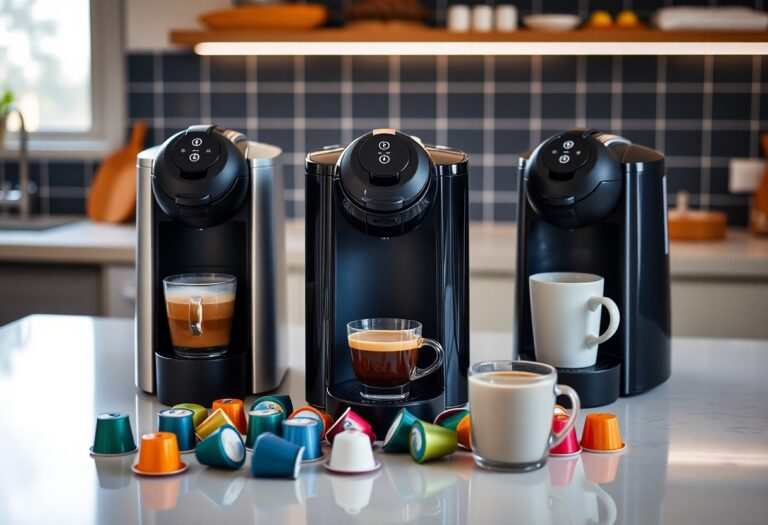
The Anatomy of a Keurig Machine
Understanding the anatomy of a Keurig coffee machine allows you to navigate its features with ease and confidence. With a compact design, these machines house various important components that work harmoniously to brew your favorite cup of coffee in minutes. Familiarizing yourself with these parts not only enhances your experience but also ensures optimal performance and longevity of the machine.
Key Components Explained
The main components of a Keurig machine include the water reservoir, heating element, brew head, drip tray, and control panel. The water reservoir stores fresh water until it’s heated, while the heating element warms the water for brewing. The brew head punctures the K-Cup and directs hot water through it, and the drip tray catches excess coffee. Finally, the control panel enables you to select brew settings and monitor the brewing process.
How Each Part Functions Together
Each component of your Keurig machine functions together seamlessly to create your coffee. Once you fill the water reservoir, the machine pumps water to the heating element, where it reaches optimal brewing temperature. The brew head then punctures the K-Cup, allowing hot water to flow through the coffee grounds and extract rich flavors. After brewing, any overflow is collected in the drip tray, keeping your countertop tidy and ensuring a satisfying brewing experience every time.
This intricate dance of components is precisely engineered for efficiency and convenience. For instance, water can reach the ideal brewing temperature in under a minute, allowing you to enjoy a fresh cup without the waiting time typical of traditional coffee brewers. Such efficiency stems from the interaction between the heating element and the robust pump system that delivers water at the right pressure. Consequently, your Keurig turns the simple act of brewing coffee into a streamlined process that maximizes flavor while minimizing effort.
Your First Brew: Step-by-Step
| Preparing Your Machine for Use |
Begin by ensuring that your Keurig is plugged in and placed on a stable surface. Remove the water reservoir, rinse it out, and fill it with fresh, filtered water. Return the reservoir to the machine, then power on the coffee maker. This initial setup is vital for consistent brewing quality. |
| Selecting the Right Coffee Pod |
Choose your desired K-Cup flavor from your collection. There is a vast variety of options available, from classic roasts to flavored blends, so pick one that suits your taste for this first brew. |
Preparing Your Machine for Use
Begin by ensuring that your Keurig is plugged in and placed on a stable surface. Remove the water reservoir, rinse it out, and fill it with fresh, filtered water. Return the reservoir to the machine, then power on the coffee maker. This initial setup is vital for consistent brewing quality.
Selecting the Right Coffee Pod
Choose your desired K-Cup flavor from your collection. There is a vast variety of options available, from classic roasts to flavored blends, so pick one that suits your taste for this first brew.
Selecting the right coffee pod can transform your brewing experience. Keurig offers a wide array of K-Cup options, so consider flavor profiles, roast types, and even seasonal specialties. If you’re unsure where to start, classic coffee blends like medium roast are a safe bet. If you’re feeling adventurous, flavored options such as caramel or hazelnut may add an exciting twist to your cup. Take the time to explore, and you might discover your new favorite brew.

Customizing Your Brewing Experience
Your Keurig coffee machine is not just a one-size-fits-all device; you can tailor each cup to match your preferences. By adjusting brew strength, temperature, and experimenting with flavor varieties, you’ll unlock a personalized coffee experience you’ll look forward to every day.
Adjusting Brew Strength and Temperature
Fine-tune your coffee according to your taste by adjusting brew strength and temperature settings through the machine’s interface. This allows you to achieve a bolder cup or a smoother finish. The following table outlines the options available:
| Brew Strength | Choose between Regular and Strong settings. |
| Temperature | Set your brew temperature to Low, Medium, or High. |
Exploring Flavor Varieties and Additions
Take your coffee enjoyment further by experimenting with different flavor varieties and additions. With a multitude of K-Cup options available, you’ll find anything from rich dark roasts to light blends, flavored coffees, and even tea.
Dive into the world of flavors by selecting K-Cups that appeal to your palate, like vanilla hazelnut or caramel macchiato. Beyond the pods, consider adding spices, flavored creamers, or even a sprinkle of cocoa to enhance your drink. A touch of cinnamon can elevate your morning routine, while a splash of cream can add richness. Play with proportions and ingredients until you find the perfect balance that suits your taste buds. The possibilities are limitless, making your coffee moments not just routine, but a delightful ritual.
Troubleshooting Common Issues
If your Keurig coffee machine isn’t functioning as expected, you may encounter a few common issues. Identifying and addressing these problems can enhance your coffee experience and prolong the life of your machine. From inconsistent brewing to water not flowing properly, knowing how to troubleshoot these matters will have you sipping your favorite brew in no time.
Addressing Brewing Errors
Brewing errors can arise due to various factors, including the wrong pod, sediment buildup, or insufficient water levels. Ensure you’re using the appropriate K-Cup size for your model. Regularly check the water reservoir and keep it filled above the minimum line. If sediment is the issue, running a cleansing brew with just water helps clear blockages and restore proper function.
Maintaining Your Keurig for Longevity
Proper maintenance plays a significant role in the longevity of your Keurig coffee machine. Regularly descaling your machine helps remove mineral buildup caused by hard water, which can lead to blockages and reduce efficiency. You should perform the descaling process every 3 to 6 months, depending on your water quality. Additionally, clean the needle and K-Cup holder frequently to prevent coffee grounds from accumulating, ensuring optimal brewing performance.
Incorporating maintenance routines into your schedule can vastly improve your Keurig’s performance. For descaling, using a mixture of equal parts white vinegar and water is a natural option. Fill the reservoir, run a brew cycle without a K-Cup, and repeat until the reservoir is empty. Follow up with a few cycles of clean water to eliminate any residual vinegar taste. Regular cleaning, including wiping the exterior and rinsing removable parts, makes a huge difference and can extend your machine’s life significantly.
Eco-Friendly Practices with Keurig
Utilizing a Keurig coffee maker can align with eco-friendly values by incorporating sustainable practices into your coffee routine. You can explore Keurig coffee maker manuals for guidance on optimizing your machine’s efficiency. By choosing sustainable practices, you can enjoy your java while minimizing your environmental impact.
Sustainable Pod Choices
Opt for eco-friendly coffee pods that are made from biodegradable or recyclable materials. Many brands offer reusable K-Cups that allow you to fill them with your choice of coffee, effectively reducing single-use waste. Look for options that are certified organic or carry fair trade labels, ensuring both quality and sustainability in your coffee consumption.
Tips for Reducing Waste
Implementing simple habits can significantly cut down on waste when using your Keurig. Consider the following techniques:
- Use reusable pods to limit single-use plastics
- Recycle any recyclable pod materials in compliance with local guidelines
- Invest in a coffee grinder for fresh, ground coffee to reduce pre-packaged pods
Knowing these strategies can help diminish your coffee routine’s ecological footprint.
Simple practices can make a big difference in reducing waste. Try saving energy by turning off your Keurig when not in use, and only brew the amount of coffee you need to minimize spills and waste. Explore local recycling options for your pods and other packaging materials, ensuring that they are properly disposed of. Lastly, compost any organic waste like used coffee grounds, which can enrich your garden soil and reduce landfill contributions. Knowing how to adapt your habits will create a more sustainable coffee experience.
- Embrace energy-efficient brewing by turning off your machine
- Participate in local recycling programs for pod disposal
- Utilize spent coffee grounds for gardening or household uses
Knowing these techniques can elevate your eco-friendly coffee-making game.
Summing up
Hence, by following this operating guide, you can efficiently work your Keurig coffee machine to brew the perfect cup of coffee. Start with filling the water reservoir, choosing your desired K-Cup, and adjusting your brew size. After brewing, be sure to clean the machine regularly for optimal performance. With these steps, you’re well-equipped to enjoy delicious coffee at your convenience, enhancing your daily caffeine ritual.
FAQ
Q: How do I set up my Keurig coffee machine for the first time?
A: To set up your Keurig coffee machine, start by removing it from the box and placing it on a flat, stable surface. Fill the water reservoir with fresh water up to the maximum fill line, ensuring that all packaging materials are removed. Plug in the machine and power it on. Next, perform a water-only brew by placing a cup in the drip tray and selecting the brew button without using a coffee pod. This process will help to clean the internal components and prepare the machine for brewing coffee.
Q: What type of coffee pods can I use with my Keurig machine?
A: Keurig machines are designed to work with K-Cup pods, which are specifically cut for optimal brewing. Brands like Green Mountain Coffee, Dunkin’, and Starbucks offer K-Cup options. Additionally, reusable K-Cup filters are available, allowing you to use your own ground coffee. Just be sure that any alternative pod or filter type is compatible with your specific model of Keurig.
Q: How do I clean and maintain my Keurig coffee machine?
A: Regular cleaning and maintenance will help extend the life of your Keurig. Begin by emptying the water reservoir and the drip tray. Wash these components with warm, soapy water, then rinse and dry them thoroughly. For the needle that punctures the K-Cup, use a paperclip to remove any coffee grounds. Additionally, perform a descaling process every 3-6 months with a mixture of equal parts water and white vinegar, especially if you notice a reduction in brew speed or taste. Rinse thoroughly afterward.
Q: How do I brew a cup of coffee using my Keurig?
A: Brewing coffee with a Keurig is quick and straightforward. First, fill the water reservoir if it’s low. Turn on the machine and wait for it to heat up, which typically takes a minute. Select your K-Cup pod and insert it into the pod holder until it clicks into place. Choose your desired cup size by pressing the corresponding button, then press the brew button. Your coffee will be ready in just a minute! Dispose of the used pod and enjoy your beverage.
Q: What should I do if my Keurig machine is not brewing coffee?
A: If your Keurig is not brewing correctly, there are several things you can check. Make sure the machine is plugged in and powered on. Check for any water blockages by inspecting the water reservoir and the brewing needle for clogs. If there’s no water flow, try running the machine with just water to clear any debris. If problems persist, performing a descaling process may help. If none of these solutions work, consult the user manual or contact customer support for further assistance.